Wi-Fi Extender ROCKSPACE AC1200
First, let’s look at the Rockspace Ac1200 Extender setup. Let’s start with the specifications. It will help you eliminate WIFI dead spots in your house or business by enhancing wifi signals up to 2640 square feet and providing you with sufficient connectivity in every corner.
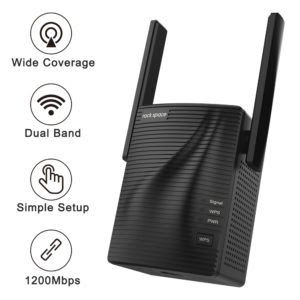
- The dual band connectivity of the Rock Space 1200Mbps will provide a stable and enhanced Wi-Fi connection, which is ideal for online streaming and gaming.
- The WPS button is included to assist you in quickly and painlessly setting up your repeater.
- When it comes to security, the AC1200 offers WPA and WPA2 encryption, ensuring that no one else can access your private internet.
We’ll go over how to instal your Rock space AC1200 repeater, as well as how to upgrade firmware and factory reset the extender to connect to a new router or modem in this post.
WPS setup for the Rockspace AC1200 extender
- To begin, plug your AC1200 extender into a nearby power outlet near your main Wi-Fi router or modem.
- Push the WPS button on the repeater once the power led light on the repeater has turned green.
- Tap the WPS button on your modem or router after around two minutes.
- Both gadgets will be equipped with blinking lights.
- If the repeater’s led lights are all lighted up, it signifies your Rock space has been successfully linked.
- Then, put your AC1200 repeater where the signals are weak or bad.
- Finally, to witness the change, connect your device to the Rock space repeater.
Installation Help for the Rockspace AC1200
Now we’ll go through how to connect the wireless repeater to your current wireless router or modem step by step.
Let’s get started with the Rockspace Ac12oo extender setup:
- Any electrical outlet will work with your AC1200 extension.
- After that, wait until the indication indicates that it is turned on.
- Navigate to your tablet or computer’s wifi settings.
- Select the “Extension” network as the default.
- This is the configuration page for the Rockspace AC1200 extender.
- To begin the installation, type in the default login and password “admin.”
- Connect your repeater to the current network by following the instructions outlined above.
What is the procedure for configuring the Rockspace AC1200 Range Extender?
- To begin, connect the Rockspace AC1200 extension to a power outlet.
- To begin the installation procedure, make sure the extender’s solid led power light is illuminated.
- Now join the default “Rock space Ext” network with your WIFI-enabled device.
- Then, in any web browser, put the default web address “Ap.Setup” into the address box.
- Login with the password “ADMIN” and your device will search for visible networks.
- Follow the instructions on the setup page to completely connect the repeater to the main Wi-Fi network.
Rockspace AC1200 troubleshooting steps
- Always double-check that your AC1200 is turned on and that it is securely connected to the outlet.
- Check to see if the ethernet cables are securely attached; if not, tighten them up.
- Unplug the wireless repeater and wait a minute before plugging it back in. If it isn’t working properly, switch it back to “ON.”
- For signal, place your Rockspace extender close to the main router and see if it works.
- Your Rockspace AC1200 router can also be reset quickly. To reset your extender box, you will require a needle. A reset button is visible on your extender. Hold the reset button for five seconds before releasing it to put your extender back into factory settings. After the extender is reset to factory settings, you must re-configure it.
- Please remove any electric devices that are close to the repeater because they will cause connectivity issues as well.
- Make sure the booster only has the power light when using the Rockspace AC1200 extender. Please factory reset the booster if you have any other lights than the power light.