

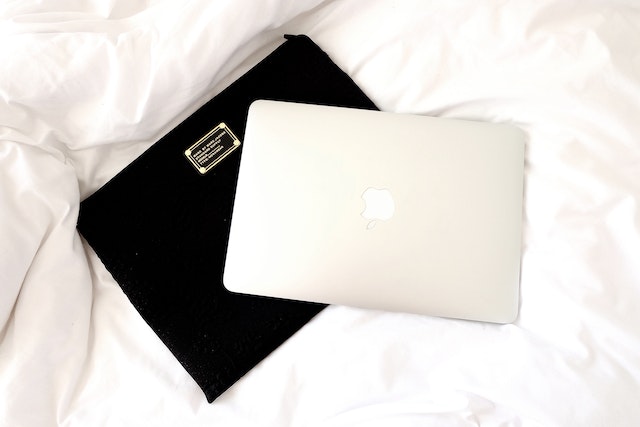
Laptop sleeves protect your tech while on the go. Instead of a generic sleeve, design a custom case tailored to your needs and style. A DIY laptop sleeve is a simple project resulting in a unique accessory. This step-by-step guide walks you through choosing materials, taking measurements, creating sketches, cutting, sewing, adding finishing touches, testing the fit, and caring for your finished product. You can craft a professional-looking laptop sleeve with some basic skills and patience.
Choosing the Right Materials
Materials determine the durability, texture, and look of your custom laptop sleeves. Consider materials like felt (for minimal protection), canvas (for moderate protection), leather (for high-end protection), or water-resistant nylon (for element protection). Felt comes in various thicknesses, from 1/8 inch for basic protection to 1/2 inch for more substantial padding. Canvas offers a range of weights and different levels of firmness. Leather provides long-lasting protection with a polished appearance but requires special tools to cut and sew. Water-resistant nylon is lightweight yet shielding, perfect for an outdoor sleeve. Choose a material based on your laptop’s needs and your desired design.
Measuring Your Laptop
Precise measurements ensure a snug and secure fit for your custom laptop sleeve. You will need to measure your laptop’s length, width, and depth in inches, including any padding already built into the case. For the sleeve opening, measure the circumference around the laptop edges. Consider adding 1/4 inch to each measurement for room to remove and insert the laptop. Having someone assist you with the measuring tape for larger laptops helps ensure accuracy. Record the measurements for referencing during the cutting and sewing stages.
Sketching Your Design
A design sketch maps out the visual elements of your laptop sleeve before cutting it into materials. Think about doodling shapes, pockets, straps, or patterns. Look at examples of other handmade or designer laptop sleeves for inspiration. Consider matching or complementing the colors and styles of your other tech accessories. Sketch directly onto the fabric or paper and enhance the design with details like embroidered letters or iron-on graphics. Creating a well-developed sketch sets you up for success in achieving your desired completed vision.
Cutting and Preparing the Materials
Carefully cut the materials according to your measurements. Double-check measurements before making final cuts. Iron felt or canvas pieces to flatten them and smooth edges, especially if using thicker materials. Score the cut line with a utility knife before cutting with shears for leather. Corresponding kits, grommets snap, or Velcro dots can be applied during this stage. Properly preparing materials prevents frustration and inaccurate cuts or sizing during assembly.
Sewing the Sleeve
With the right sides together, pin the front piece to the back piece around 3 edges, leaving the top open. Use a sewing machine with the appropriate needle and stitch type or binder clips in place of pins for leather or water-resistant nylon. Sew the pieces together using a straight or zigzag stitch and durable thread. Leave a 3 to 4-inch opening for inserting the laptop. Trim excess seam allowances to minimize bulk. Use pinking shears to finish seams and prevent unraveling in some fabrics. An iron helps set the stitches as they are. Sewing slowly and reinforcing with multiple passes prevents missed stitches.
Adding Finishing Touches
Finishing touches elevate your custom laptop sleeve with a polished appearance. Add a zipper, Velcro flap, buttons, straps, or snaps to seal the open end securely—Embroider design monograms by hand or using a sewing machine. Fuse or sew on iron-on graphics or patches for extra style. Edge binding made from fold-over elastic or leather lace provides a clean border finish for the sleeve edges. Apply a coat of waterproof sealant for leather or nylon sleeves. Added details make your laptop sleeve fully functional and help reflect your creative vision.
Testing and Adjusting the Fit
With the finishing touches complete, test the fit of your custom laptop sleeve. Carefully slide your laptop into the sleeve. It should fit snuggly but is easy to remove and insert quickly when needed. If too tight, loosen it by widening the seam allowances. If too loose, add small darts or elastic bands for security. Before completing, make sure all pockets, straps, and closures work as planned and make any required alterations. Repeat the testing and tweaking procedures until you are happy with the sleeve’s fit and usefulness.
Caring for Your Laptop Sleeve
Follow some basic care guidelines to keep your custom laptop sleeve looking its best. Gently wipe away dirt or spills on washable fabrics immediately before stains can set in. The sleeve can be hand- or machine-washed; let it air dry away from direct heat. Use cold water and light detergent while washing your hands. Do not bleach sulfate-containing materials like canvas. Leather or water-resistant nylon can be spot-cleaned using a damp cloth. Avoid submerging non-washable sleeves in water. With proper care and storage, a custom laptop sleeve provides protection and lasts for years.
Conclusion
A laptop sleeve protects your tech in style. By following the steps from choosing quality materials to testing the fit and caring for your finished sleeve, you can craft a functional and durable accessory tailored to your needs. Unleash your creativity with a one-of-a-kind laptop sleeve design, and enjoy using an item made by hand. Keep your laptop protected and reflect your unique style with a custom sleeve perfect for you.