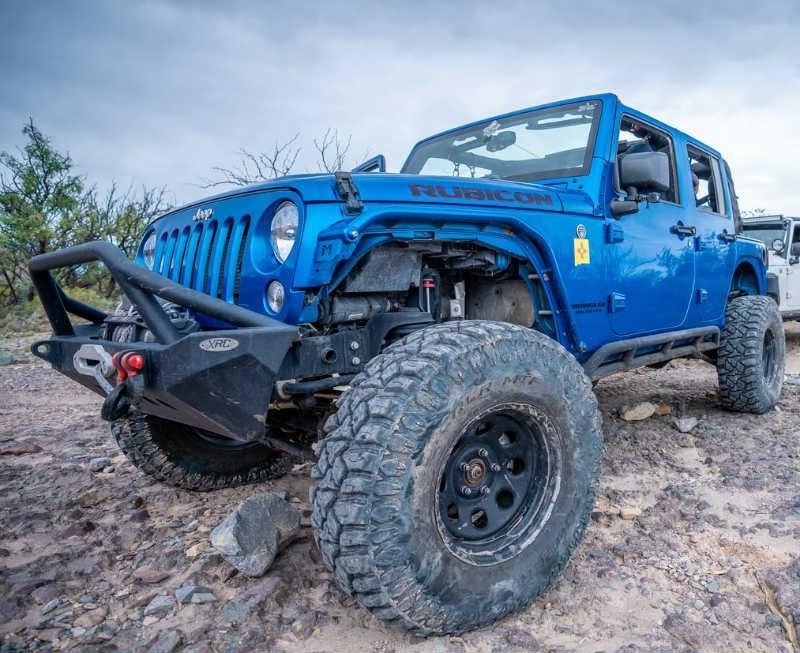
Finding its sole purpose on the front of a ute or any 4×4 vehicle, the nudge bar is a piece of aluminium tubing made to protect the front grille. Although it provides a minimal level of protection nudge bars can be quite effective. Their small and lightweight construction is thanks to the material they’re made of which alongside aluminium can also be polycarbonate. Nudge bars usually provide a bit of both aesthetics and protection as well as some space for accessories.
Benefits of Nudge Bars
Protection
The level of protection may not be a lot but it is enough to keep your vehicle safe from animal collisions. If you drive in animal strike prone areas you can rest assured that the damage will be taken by the nudge bar instead of the front grille. A universal nudge bar is made so that they throw the animal up and away from your vehicle. They’re also made to work with your vehicle’s airbags which means in case the animal lands on your windscreen the airbags will deploy without any issue.
A front nudge bar also keeps trees, shrubs and pother off-road hazards from getting to the front part of your vehicle. Some of these items can get caught up and jammed in all the wrong places of which the most common is the torrent search engine bay. You’re better off getting a new nudge bar than sending in your vehicle for engine repairs.
Aesthetics
Improving safety isn’t the only benefit you get from a universal nudge bar. The appearance of your SUV or ute can become much bolder. You can also make a nudge bar stand out by choosing one with a contrasting colour or make it blend in with the exterior of your vehicle.
Accessories
If that isn’t enough you can also add some accessories on your nudge bar – ones that you couldn’t add before. These include a winch, driving lights or a UHF antenna. A winch will help pull you out of a bog and the lights will provide some clarity in the complete dark.
Nudge Bar vs Bull Bar
A lot of people ask what is the difference between a bull bar and a nudge bar. To put it simply a bull bar is a more protection-oriented option which is why it is also heavier and a lot harder to install. A nudge bar is simple yet effective enough to make for a safer ride. While it is not as rugged as a bull bar, a nudge bar is a lot lighter and a lot easier to install. This can vary depending on the material it’s made of but since it’s smaller than a bull bar, a nudge bar does not affect fuel economy as much.
Nudge Bar Materials
Steel
The most tensile and the strongest material a nudge bar can be made of is steel. A steel front nudge bar is going to provide you with the best protection possible. A steel nudge bar is still not going to weight as much as an aluminium bull bar despite being made of heavy material.
Plastic
Plastic front nudge bars are your least expensive ones but also your least protective option. Being the lightest nudge bar you’ll find, plastic bars are not going to be taxiing on fuel economy at all but you better watch about for animals.
Aluminium
If you don’t want to pay the price of steel front nudge bars but want its strength and lightweight properties of plastic bars then go with aluminium bars. Why? Aluminium is not only light, but it is also quite strong for its lightweight properties. You may not find aluminium nudge bars as affordable as plastic ones but at least you won’t pay as much as you would for a steel one.
How to Install a Nudge Bar
While the installation process of a nudge bar is not the same for every vehicle there are still some steps that are included in every nudge bar installation.
1. The first step you need to take no matter the model of your vehicle is to remove the front dust plate. This is done by removing the screws and plugs holding it. Then you need to take off the bolts where the brackets will go and use the ones that came with the nudge bar. Don’t tighten them fully so you’re able to adjust the brackets afterwards.
2. The same thing needs to be done for the support bracket and once you’ve done that you’ll then need to remove the plugs in the chassis. This will give you access to the top plugs which you’ll need to remove with a long screwdriver. Next, you usually need to insert T-bolts in both holes without them touching any hoses. When done you should install the other side of the support bracket.
3. After that you need to place the dust plate against the brackets and mark their position on the dust plate. Cut the marked positions and place the dust plate so that it sits snugly against the brackets. Reinstall the bolts and plugs you previously removed and install the nudge bar to the brackets. Have someone hold it for you whilst you fasten the bolts. Once you ensure that the nudge bar is level and snug against your vehicle go ahead and fully tighten the rest of the bolts. Make any adjustments before you tighten the bolts and you’re done.