

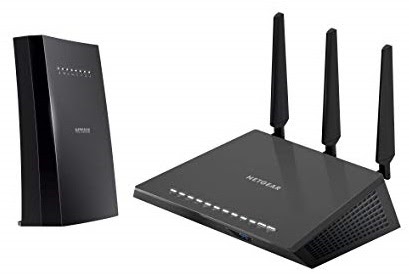
Netgear EX8000 WiFi Setup: Netgear AC3000 Setup
We’ll go through how to set up a Netgear AC3000 Setup in this blog. As you may be aware, Netgear is one of the most well-known names in the Wi-Fi market. Netgear is renowned for providing new technology and innovation to routers and Wi-Fi extenders. In this article, we’ll discuss one such Netgear model that’s meant to extend the range of your Wi-Fi and provide a larger and more powerful signal or Wi-Fi for your home network.
Using the Netgear installation instruction, set up the Netgear AC3000.
Let’s start by trying to figure out how to connect to the Netgear AC3000 installation assistant.
- The first step in the Netgear AC3000 setup is to connect the extender to the power socket.
- Wait for the power LED light to become green after connecting it in. If it doesn’t work, double-check the on/off button.
- On your Wifi device, such as a laptop, tablet, or cellphone, go to the settings option.
- On your device, open an updated web browser.
- To complete the procedure, type Mywifiext.net or https://192.168.1.250 and click enter.
- You’ve arrived at the Netgear AC3000 Setup page.
How can I connect a Netgear EX8000 to an existing WiFi network?
- On the Netgear AC3000 Setup screen, click.
- You will now be sent to the mywifiext login page.
- The first step is to create a user name. After that, you must establish an alphanumeric password.
- Then double-check that you’re using the same password.
- Now you must choose and answer the two security questions.
- Now go to the Netgear Ex8000 configuration page and click on input login.
How to use mywifiext.net to set up a Netgear AC3000 router
Wireless and access point options are available for the Netgear Ac3000 configuration. So, in this choice, we’re going to speak about how to connect Netgear Ac3000 to the wifi option.
- The initial page of the Netgear Ex8000 setup will prompt you to pick between 2.4 and 5GHz for your home wifi network.
- After that, you’ll need to choose your home wifi network. Continue using Mywifiext by clicking the button.
- It will now prompt you to input your home wifi password before moving on to the next step.
- The default extender network name will now be shown on your device.
- Create your own Netgear AC3000 name and password if you want to modify it.
- The setup of the Netgear EX8000 has been completed. After that, connect any wifi-enabled device to your Netgear EX8000 and click proceed.
So now your Netgear EX8000 Setup is successfully linked to your home wifi network. Place your extender in the area where your internet connection is poor. You will notice a change after plugging in the extender, as well as nice speed.
How to Setup a Netgear AC3000 Extender Through an Access Point
A Wi-Fi access point may also be used to instal the Netgear AC3000 extender. It provides a wireless hotspot as well as ethernet connections. The instructions to utilise the Netgear extender as an access point mode are listed below. Let’s get started: –
- Connect the extension to a functional power outlet.
- If the power LED on the extender does not turn green, hit the power button.
- For this reason, Open your web browser and go to mywifiext after connecting your PC or smartphone through ethernet.
- The Netgear installation’s assistance will be on show.
- After that, connect your primary router to the ethernet port of the extender with an ethernet wire.
- Return to the Netgear installation assistant and complete your extender as an access point mode by following the instructions.