Do you need to record your computer screen without installing programs? Do you want to edit your videos without having to install programs? If your answer is yes, continue reading until the end of the article recordcast helps to record video without Installing programs.
Hello innovative teachers. In today’s post, we are going to explain step by step how to use a tool to record the screen of our computer without installing any program. This post is very useful if you want to create video classes, tutorials, and any type of video. The tool that we are going to learn about is RecordCast Screen Recorder.
Step 1: Enter the web browser
In this case, I am using Google Chrome and record screen with RecordCast Screen Recorder, a popular online recording tool you may have already known. First, get to its website: Recordcast.com.
Recordcast is a website that offers us the possibility of recording the screen of our computer and also offers us a video editor.
This website’s strong point is that it is totally free, and you do not need to register an account for recording. We can record in very good quality, up to 1080p.
Once inside the homepage of the website, we have several options. We can register or log in in the upper right if we already have an account created. As I said previously, registration is optional. Also, it offers us to start a recording or use the video editor.
By clicking on the register button, we have several options to register. We can register with our Facebook, Google account, or by entering our email and password. Then, we must click on the register button, and that’s it. In that same window, we can log in. When we create our account in RecordCast, the following panel will appear.
Right in the center will appear all the videos that we have created. We have the button to create a video by recording and the video editor on the left side. In the case of not registering, we have those same buttons. Also, there is a folder with my projects- I have two empty projects here. To start recording, we just have to click on “Create by Record” or “Start Recording” on the homage.
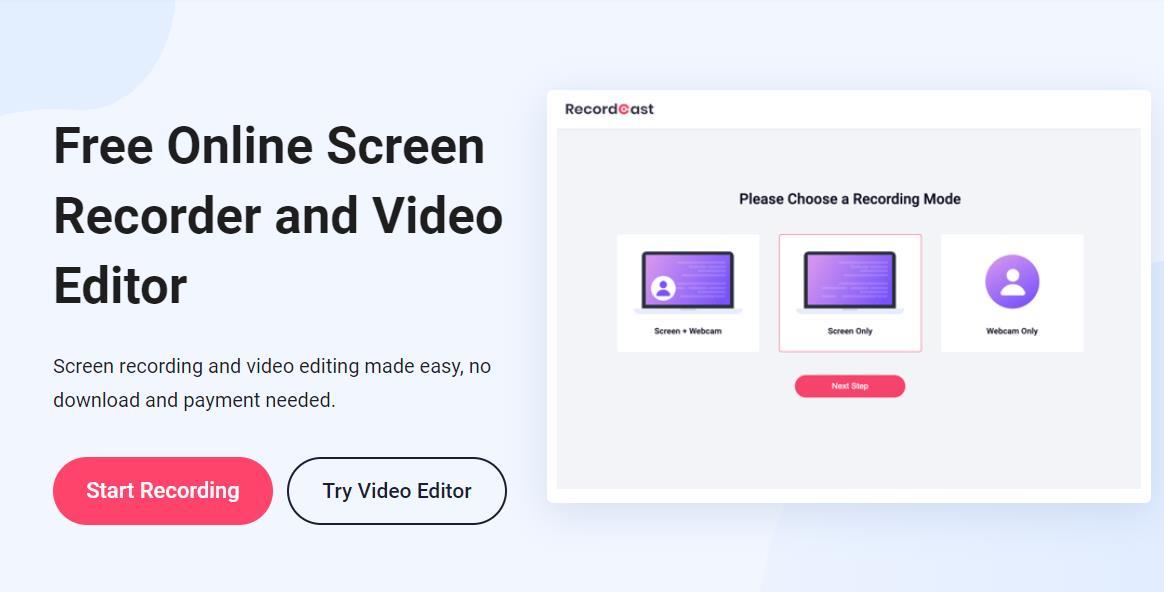
Step 2: Choose a recording mode
The next step is to press the button to start a recording, and here we must choose the recording mode we want.
We can choose to record the screen plus the webcam. If we do not want to use both, we can only record the screen or only record our computer’s webcam. I’m going to select the entire screen and click Next Step.
Step 3: Select the audio recording method
Similarly, on the main window, we can choose the recording audio, which can be the microphone plus audio in the system, microphone only, system audio-only, or no audio.
If we click on the “Show More” option, we can choose another camera or microphone to have others. I will leave it the same because I always use what comes by default on my computer. Right at the end, it tells us that the recording lasts 30 minutes. Click “Start Recording” here.
Step 4: Choose what you want to record
Here we must choose if we want to share the full screen, an app window, or a tab in our browser. I’m going to choose the full screen and remember to check the audio share box.
Click in the center so that the share button can be activated, and then click on that button. We only have to click on the red button. In the case of having a PowerPoint presentation, it is recommended that you have the presentation open.
I already have an open presentation. I will carry out the presentation’s simulation to show the necessary steps to create our video classes and tutorials.
Step 5: Recording
After you have finished with the recording, you can click on stop sharing, and the video will appear. Here we can play the video to preview it, download it, or edit it.
We can automatically start the download by clicking on the Download button. Or directly go to the video editor by clicking on the “Edit and Export in MP4” button. We can use its video editor to apply effects, elements to polish the video.
Step 6: Edit recording and export
Here you can upload several videos and photos to merge them into a new one. Add text captions, background, elements, overlays, etc., to your recording. RecordCast has more than a million elements under its database. You can even adjust the elements’ duration, crop, split your video clips, and so on according to your needs.
After everything looks perfect, click on the Export button and choose a resolution to export it to your computer in an MP4 file. You have three options for the final video resolution here: 480p, 720p, 1080p. All of them are free to choose from. There is no watermark or ads. Finally, you get your video tutorial on your computer. It’s time to send it to whoever you want. You can also share it on any video platforms you like. It’s pretty simple to record video tutorials with RecordCast, right? Try it out now.