We all love food and not only for its taste and satiety 🙂 The aesthetic and we will not be afraid of this word; the artistic value of dishes is sometimes no less important than its ingredients or calorie content.
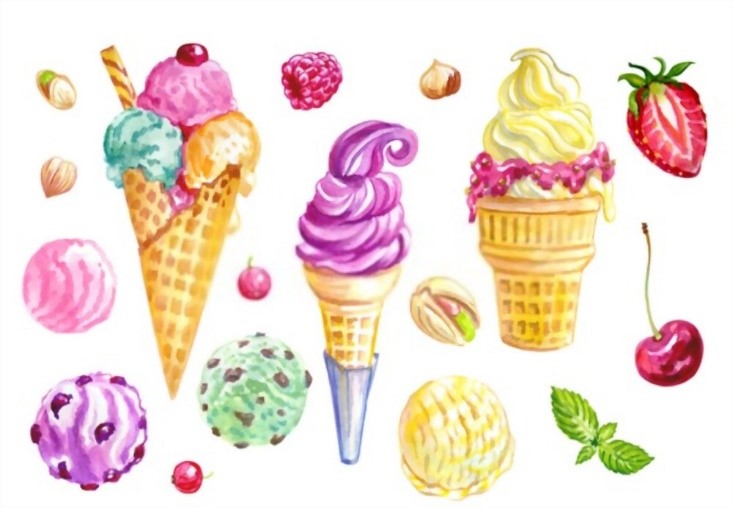
Food sketching: ice cream with cherries and nuts.
The trendy food sketching will help you capture and share this value with others.
One of the reasons for using one line drawing tutorial is through the huge possibilities of using food illustrations. Indeed, with all the variety of photographs, sometimes it can be difficult to find a picture with the desired composition or ingredients. While it allows you to combine many details, arbitrarily change the angle and place accents depending on the goals. Such cool drawings are often used for logos, used in the design of menus, websites, and printing.
Materials for watercolor sketching
I use St. Petersburg watercolor. I would also recommend Ladoga. These are very high-quality paints. I use synthetic brushes; they do not peel off and hold liquid and shape well enough. For beginners, I would recommend round -1, 3, 6, 8, flat corner 8, and cut -6, the paper used in my palazzo lessons.
This is not expensive and high-quality paper. The porcelain palette that I use is an expensive thing, for beginners, I advise you to take a white porcelain saucer. The fact is that plastic palettes do not allow you to see the color of the drop, and the paper absorbs the paint. And be sure to get a rag. Can be disposable. Pour warm water into a large jar. And let’s start.
Pencil sketch in food sketching
So where does watercolor begin?
Of course, with a clear WAN worked outline cool drawing ideas. It is very important that the line drawing is very pale and neat, otherwise, all the lines will be visible, as the watercolor is transparent paint.
Watercolor shape fill
When the line drawing is ready, you need to overlap the layers of paint. Precisely layers. Layered watercolor paint. In order not to engage in coloring, and to put the color of exactly the saturation that you wanted, be sure to check it on the palette. If too bright, dilute the paint with water.
So, let’s start with a waffle cup. We paint with ocher beige paint, rather pale. The right is slightly brighter, the left is slightly paler. Leave the middle unpainted.
Here’s what we should get.
Add a little reddish-brown to the not yet dry right edge.
We mix ocher with warm yellow and with a lot of water, pale, in shape, paint ice cream with gaps. Please note that most of it remain unpainted. Put the shadow with a greenish tint. Be sure to try and mix the colors on the palette. Otherwise, the color you have taken may turn out to be quite bright.
We paint the cherry. We paint the edges with bright burgundy red paint. Then we wash the brush and dilute this red inside the cherry with water without paint. The highlight should remain white
We paint the leg of the cherry with herbaceous green.
Drawing food from nature is a great warm-up and little daily practice for those who want to stay creative at all times. Get a little notebook and try sketching all your food for a week, it’s very fun! First, a little advice for beginners. Fruits and vegetables! Here’s where to start. On simple shapes, it is easy to trace the location of light and shadow, and you can also practice working out the smoothness of gradients.
Start with one or two objects, try to get into the character of the form, and work out the volume. Once you feel confident in your abilities, add variety to the production by comparing different fruits and vegetables, their scale, textures, and details.
So, we got to the crushed nuts and leaves. Please note that the leaves are slightly different in color. Somewhere colder, somewhere warmer. So far, we paint pretty paint. We paint the nuts with triangular pieces and thin lines.
We work on the stick and leaves with dark green shades. Try not to paint over the entire previous layer.
Working on the cherry. In the shadows, the color becomes colder burgundy. Paints over nuts on cream. Pale and neat. Remember to check the colors on the palette.
With a thin brush, in a dark brown color, disassemble the crushed nuts.